This article explains how to create bar code labels in Microsoft Word, using Morovia barcode fonts and Monterey Barcode Creator.
You can also use Barcode ActiveX control in Word. Barcode ActiveX is considered as a programming component and less user friendly. Refer to Barcode ActiveX manual for detailed information.
It is easy to create labels in Microsoft Word once you have a copy of Morovia barcode fonts, or Monterey Barcode Creator. This tutorial demonstrates how.
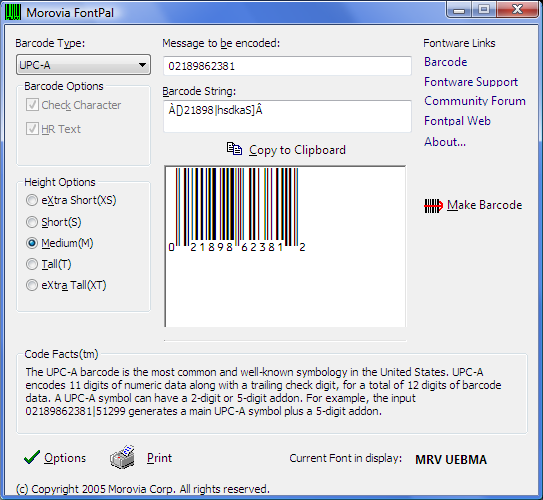
When you use barcode fonts, keep in mind that never format data directly using the font, as it does not work in most cases. Instead, invoke Morovia FontPal, select the barcode type, press button, and use to transfer the barcode string to clipboard.
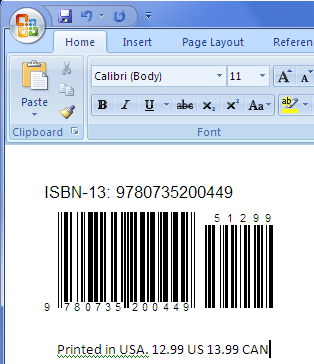
In Microsoft Word, just treat the barcode as some kind of text. You can add description around the barcode.
After you have done the design, select → From the dialog, select the label paper that you are going to print on.
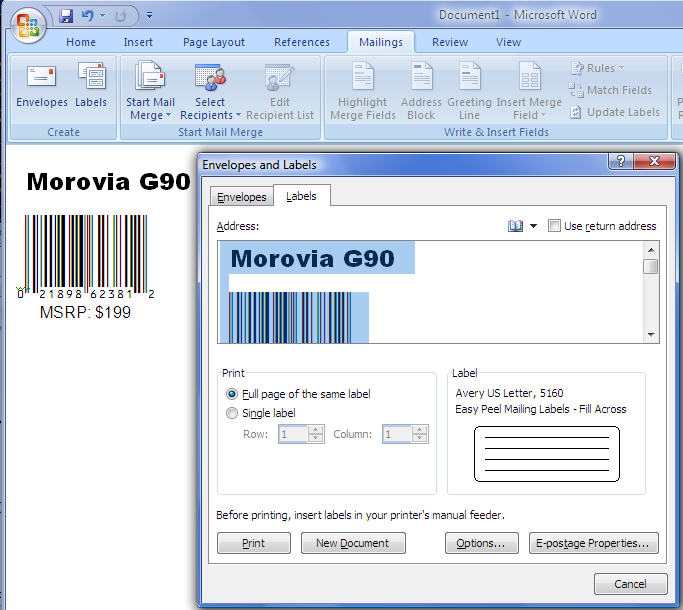
Click on , Word will create another document with full sheets of bar code labels.

Monterey Barcode Creator is also an excellent choice for making sheets of barcodes. Monterey Barcode Creator has a built-in label paper database and can print directly to label papers. Monterey Barcode Creator support adding a block of paragraphs to the image, which is sufficient in many cases. In cases that you want to add additional images, such as logo, or additional text blocks, you can create labels in Microsoft Word. First create barcode in Barcode Creator, then drag and drop into Microsoft Word. Word embeds a copy of barcode file, and you can always go back editing the barcode by double clicking on the image.